

What Is a Model?
A model is a container for:- Variables with forecast and actuals logic
- Scenarios (Base + alternate cases)
- A customizable time range
- A grid interface for entering, calculating, and visualizing data
Creating a Model
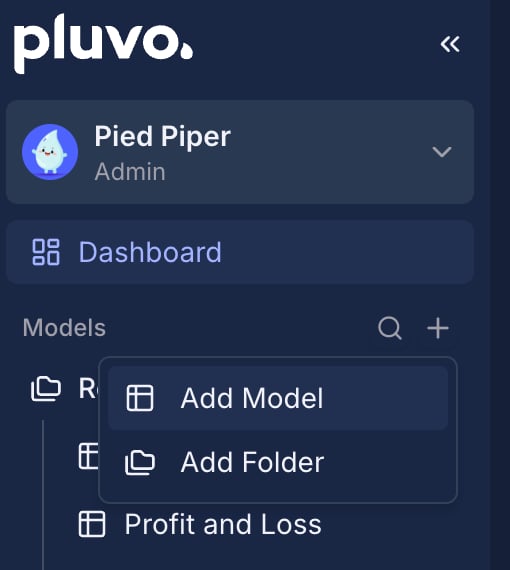
To create a new model:- Click the “+” button in the sidebar and select “Add Model”
- Name your model
- (Optional) Choose or create a folder to store it in
- Your model will open with a blank grid, ready for variable setup
Toolbar

- Search Bar Typing in the search bar will filter the grid to variables with names that match the search terms.
-
Column Toggles
Show or hide: - Sparkline column
- Actuals formula column
- Forecast formula column
-
Undo / Redo
Use keyboard shortcuts or click the toolbar arrows to undo or redo changes -
Export
Export the current grid as CSV or Excel -
Model Settings (Gear Icon)
Open settings to: - Change the model’s date range. This sets the start/end date of the current model.
- Date Picker Use the date picker to change the date rage that is visible in the grid. This does not change the model’s start/end date.
If auto-recompute is off, you’ll see a Recompute button to manually trigger updates.
Scenario Switcher
Switch between Base and alternate scenarios from the top-right dropdown. You can compare differences between scenarios, make what-if plans, and merge an alternate back into the Base version when you’re ready to commit.Organizing Models
Pluvo gives you full control over how models are structured: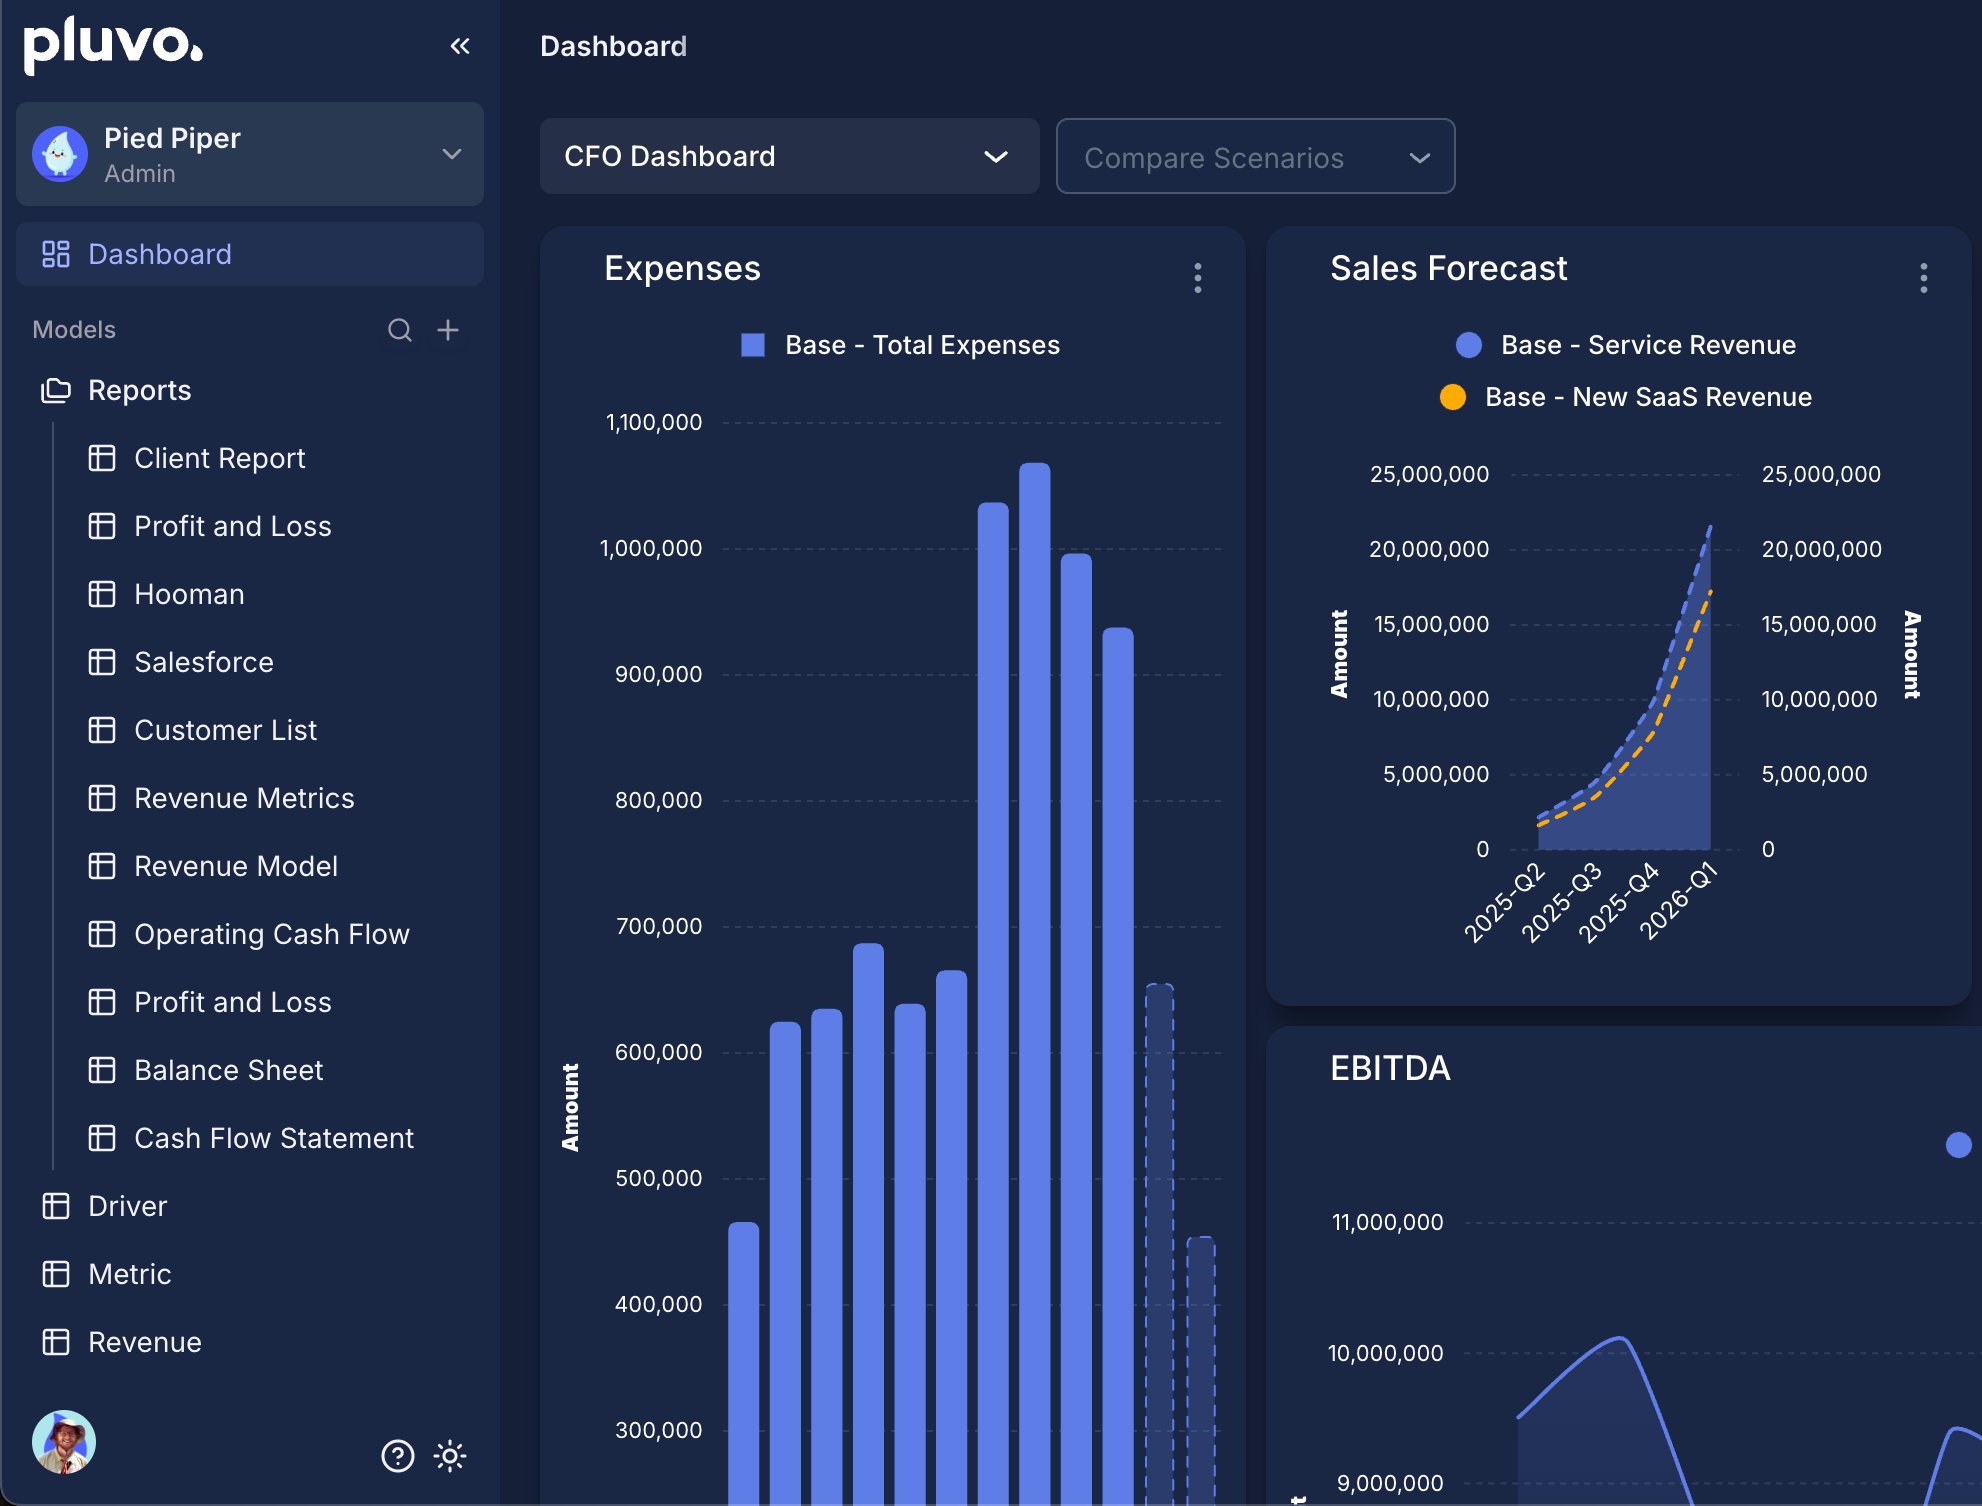
Model Folders
- Create folders to group related models (e.g., “Go-to-Market”, “Headcount”, “Operations”)
- Drag and drop models into folders from the sidebar
- Nest folders for more complex hierarchies
- Collapse folders to keep your workspace tidy

Creating a Model Folder
To create a new model folder:- Click the “+” button in the sidebar and select “Add Folder”
- Name your folder
Sidebar Visibility
- Click the chevron to hide/show the sidebar
- Models and folders are visible from the Sidebar
- You can add, move, or remove models from the sidebar by dragging or selecting the three dots next to the model/folder name.
- Use the Sidebar to quickly access and structure your workspace based on how your team plans

Best Practices
- Create separate models for major business components or planning areas
- Use folders to reflect organizational structure, planning ownership, or timeframes
- Keep models focused—then import variables between them as needed to avoid duplication