> ## Documentation Index
> Fetch the complete documentation index at: https://docs.pluvo.io/llms.txt
> Use this file to discover all available pages before exploring further.
# Refresh Integration Data
> In this section we will cover how to refresh your Quickbooks or Xero data within Pluvo:
*If you’re ever wondering why your numbers are looking slightly off, be sure that you check how recent your data sync is.*
In this section we will cover how to refresh your Quickbooks or Xero data within Pluvo:
 **Step 1:** Take a look at the data sync widget found in the bottom left corner of your interface.
We see that the Quickbooks data was synced with Pluvo 9 days ago. This means that the data sync was successful - as indicated by the green dot.
However, we want to work with nothing but the most up-to-date actual data possible.
So let’s figure out how to refresh our data.
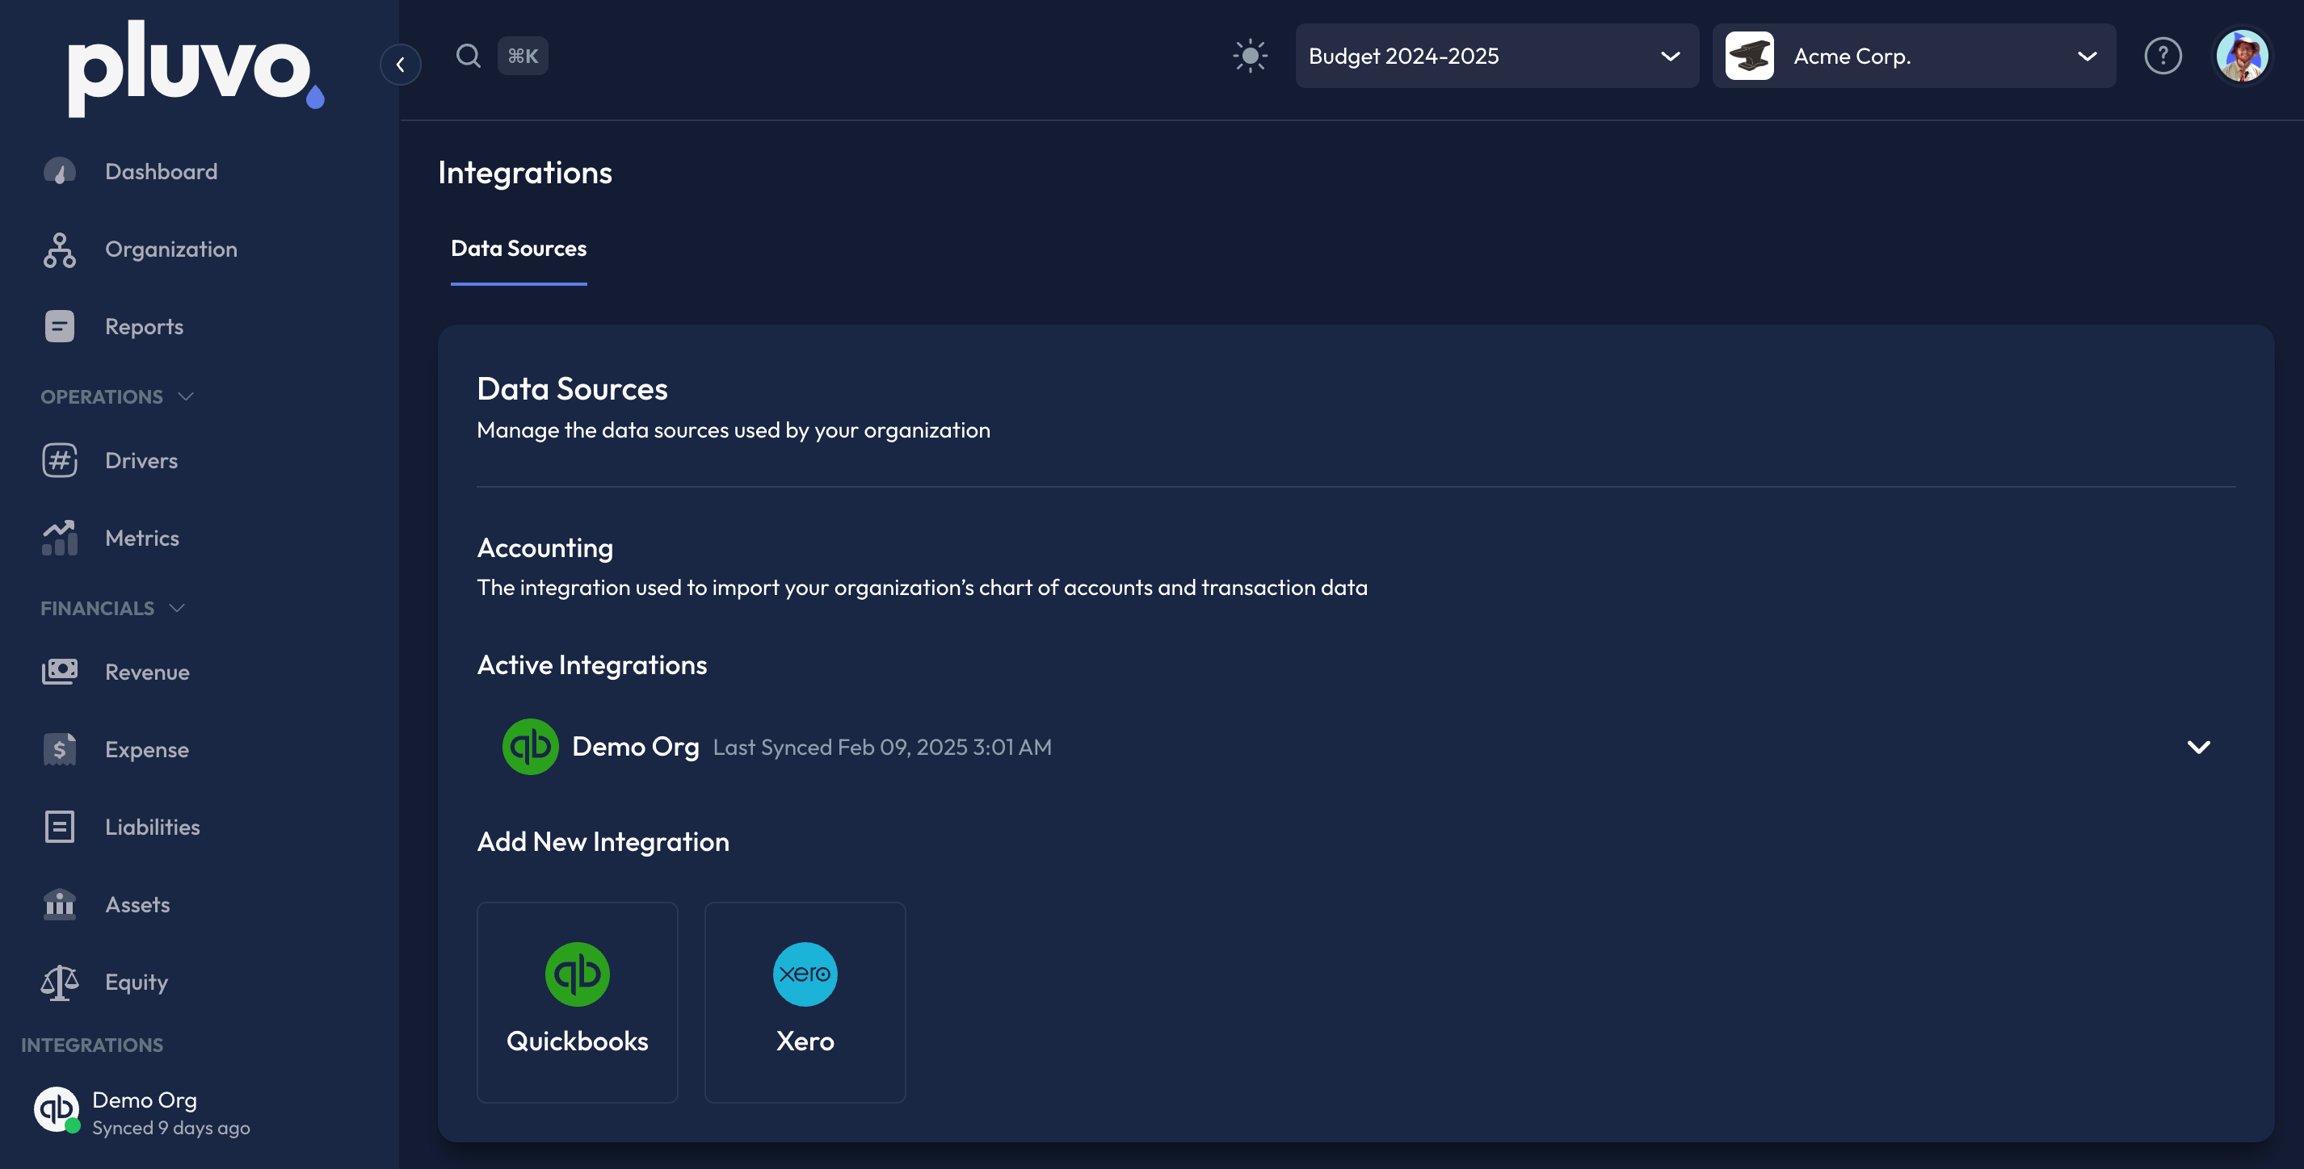
**Step 2:** Click on your integration in the bottom left corner to navigate to the data sources screen (pictured below).
**Step 1:** Take a look at the data sync widget found in the bottom left corner of your interface.
We see that the Quickbooks data was synced with Pluvo 9 days ago. This means that the data sync was successful - as indicated by the green dot.
However, we want to work with nothing but the most up-to-date actual data possible.
So let’s figure out how to refresh our data.
**Step 2:** Click on your integration in the bottom left corner to navigate to the data sources screen (pictured below).
 \
**Step 3:** Open the dropdown menu to your preferred accounting integration
\
**Step 3:** Open the dropdown menu to your preferred accounting integration
 As shown in the Data Sync knowledge article, we have already connected Pluvo to our Quickbooks Online account. This is a key step to updating your financial data. If you have not done so already, please reference that article to learn how.
**Step 4:** Press the ‘Sync Now’ button. This action may take a few minutes to complete. You can safely navigate away from this screen while your data loads.
You will be notified that your data has been synced with a popup, as well as the data sync widget in the bottom left corner of your interface.
Please note the following available actions on the data sources page:
1. **Sync now** button will pull the most recent up to date actuals from your accounting data.
2. **Change date** button will allow you to adjust the amount of historical data you are pulling into Pluvo from your accounting software of choice.
3. **Disconnect** button will disconnect your accounting software from Pluvo and delete all forecasts associated with those GLs.
Important: please contact [support@pluvo.io](mailto:support@pluvo.io) before disconnecting any of your accounting integrations.
As shown in the Data Sync knowledge article, we have already connected Pluvo to our Quickbooks Online account. This is a key step to updating your financial data. If you have not done so already, please reference that article to learn how.
**Step 4:** Press the ‘Sync Now’ button. This action may take a few minutes to complete. You can safely navigate away from this screen while your data loads.
You will be notified that your data has been synced with a popup, as well as the data sync widget in the bottom left corner of your interface.
Please note the following available actions on the data sources page:
1. **Sync now** button will pull the most recent up to date actuals from your accounting data.
2. **Change date** button will allow you to adjust the amount of historical data you are pulling into Pluvo from your accounting software of choice.
3. **Disconnect** button will disconnect your accounting software from Pluvo and delete all forecasts associated with those GLs.
Important: please contact [support@pluvo.io](mailto:support@pluvo.io) before disconnecting any of your accounting integrations.